
By Julianna Evans, BM, MM, PMP

1. Two Categories of Issues with Reeds: Mechanical and Organic:
As my college professor, Dr. Chuck West, says, “Problems with reeds boil down to two categories: mechanical and organic. Organic problems cannot be repaired mechanically–bad cane makes bad reeds. Mechanical considerations include warpage, balance, tip-to-heart relationships, tip center-to-corner relationships, vamp length, and reed thickness and width. Understanding the function of each of these considerations leads to greater control of reeds and thus greater control of our lives as players.”
So, how do you know the difference between organic problems (bad reed cane, the material from which reeds are made) and mechanical issues? My advice is to start by investing in high-quality reeds.
2. Invest in Quality Reeds:
While budget reeds may seem like a bargain, investing in high-quality reeds from reputable brands will yield better results in the long run. Manufacturers that take the time to cure the reed cane before they go to market will probably work better for you. I really like Vandoren reeds, but I have a lot of clarinet friends who have had success with D’addario and Rigotti. I wouldn’t recommend Rico Reeds, but I have tried the Rico Grand Concert Reeds in the past, and they were decent, in my opinion.


3. Reed Strength Matters:
I’ve had many beginning students over the years come to me with reeds that are unplayable for them. I’ve seen a couple of scenarios play out — 1. Usually, in my experience, well-meaning band directors will tell their beginning students to buy a strength 3 reed for beginners because, as band directors, they’ve experienced too many problems with poorly manufactured reeds. 2. The student will be playing on a reed that is too soft for them (i.e., the poorly manufactured reed). Typically, for most beginners, I have them try out the Vandoren Traditional cut in either the strength 2 or 2.5. Remember that one size doesn’t fit all when trying to find the right reed strength for yourself. Experiment with different strengths to find the perfect match for your playing style and mouthpiece.
4. Break-in Period is Essential:
New reeds need time to break in and reach their full potential. For the first several days, limit the time that a new reed is played to just a few minutes and carefully seal and polish the vamp (cut part) and the back (flat part) of the reed. Be patient and give them time to adjust to your embouchure and playing environment.
5. Rotate Your Reeds:
Rotate between multiple reeds to extend their lifespan and prevent fatigue. A well-rotated reed will last longer and maintain its quality over time. Also, when it comes to reeds, there is safety in numbers. You’ll be more confident for any performance if you know you have one out of ten reeds in your reed case that has been broken in instead of just one or two reeds. Continually add new reeds to your storage system. Always add new reeds to your rotation so that you have some new reeds you’re breaking in, reeds that are at their optimal performance quality, and other reeds that may be on their way out but are useful for warm-up practice sessions.
6. Humidity Control is Crucial:
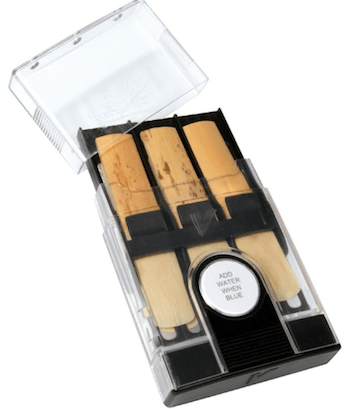
One of the most pervasive problems I find with reeds is that they will warp as the humidity changes. Controlling the humidity in the environment in which the reeds are stored and making any adjustments to the humidity as needed will help bring consistency to the performance of your reeds. I like using the Boveda Humidity Packs (72%) in my reed case to help maintain humidity control. Proper care and maintenance can significantly prolong the life of your reeds. Invest in a good reed case, keep your reeds humidified (this depends on what kind of environment you live in, i.e., dry or wet), and rotate them regularly.

7. Reed Storage Matters:
Store your reeds in a consistent environment to maintain their stability and performance. Avoid extreme temperatures and humidity levels that can warp or damage your reeds. Any reed case or storage system that helps you maintain humidity control is a good place to start. Some good options would be the Vandoren HRC10 Hygro Case for Bb/Eb Clarinet, the D’Addario Single Reed Case with Humidity Pack Control, or watch this video for more ideas.
Vandoren Hygro Clarinet Reed Case
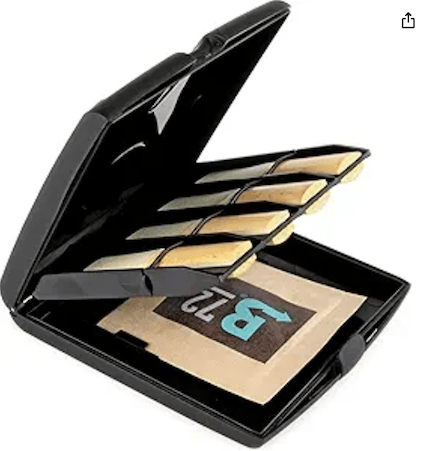
D’addario Single Reed Case with Humidity Control
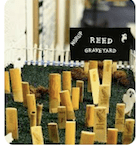
8. There might only be 1 or 2 reeds out of a box that are “good”:
Your reed will tell you a lot about its condition and playability. Listen for tone, response, and resistance changes, and adjust accordingly. As most clarinetists will tell you from experience, typically, only 1 or 2 reeds out of a box of commercial reeds will work well out of the box. That’s why it’s a good idea to learn how to make some adjustments to the reeds so that you can get better results out of all the reeds that you spent your money on.
9. Learn to Adjust Your Reeds:
Don’t be afraid to tweak your reeds to improve their playability. Learn basic adjustment techniques such as sanding and balancing to tailor your reeds to your liking. I typically like to test for the balance of the reed on my mouthpiece by doing this balancing test. A good rule of thumb is for the reed to be balanced, it must take on the mirror image of the mouthpiece facing. For this reason, this is why not every reed will work on every mouthpiece right out of the box. The player will always need to adjust for the reed to work on any mouthpiece. That being said, be prepared to lose a few reeds during the experimentation of reed adjusting. Watch this video for more info.
10. Learn to Manage Warping:
Understand that all wood warps when going from a wet to a dry state. Reeds will warp to the wettest spot, so dry them vamp down, not flat side down, so they dry evenly. Check for warpage using a wet reed and a piece of plexiglass or reed glass. Notice how much movement the reed makes as you rock the reed from left to right using your index and middle finger. You can adjust the warped reed by using #600 or #800 dry/wet sandpaper. Lightly sand the reed (from behind the vamp to the heel of the reed) back and forth across the sandpaper a few times (start with 8-12 times —you can always take more reed away, but you cannot add more to the reed). A word of caution: sanding a warped commercial reed’s entire back (length) never completely flattens it and changes the center-to-side proportions significantly. Check for warpage again by wetting the reed and starting the “rocking” test. If most of the warping is gone, you can seal the reed using the back side of the sandpaper and glide the reed back and forth a few times.
Watch the full video to see all of these tips and more!
Discover more from Clarinet Note Studio
Subscribe to get the latest posts sent to your email.
