
By Julianna Evans
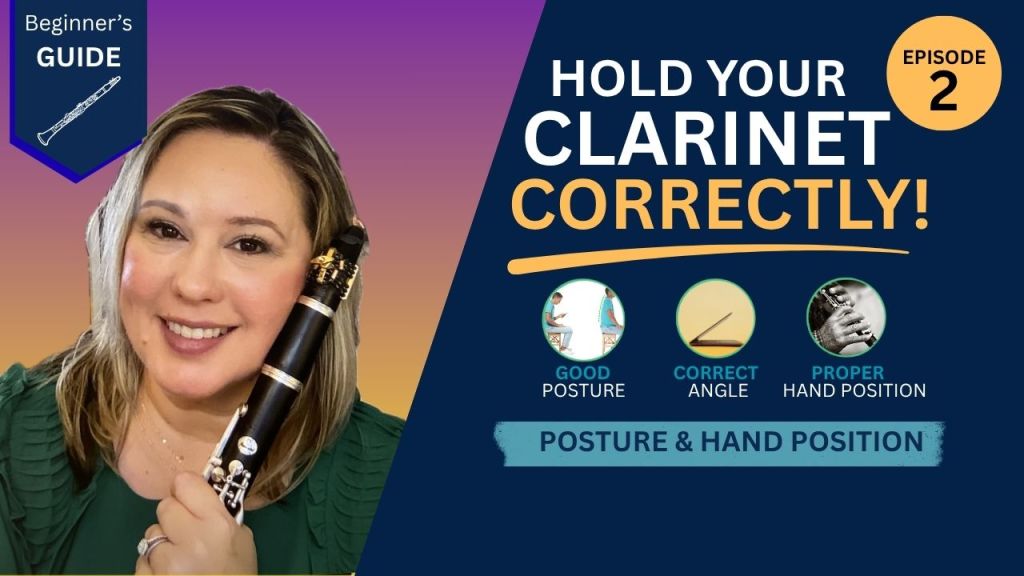
One of the biggest misconceptions about learning the clarinet is that good playing starts with your fingers. In reality, it starts with how you hold your body and your instrument. Proper posture and hand position lay the foundation for everything else you’ll learn on the clarinet. They help you breathe more freely, produce a better tone, move your fingers more efficiently, and reduce unnecessary tension before it becomes a habit.
Whether you’re just starting your musical journey or helping a young musician learn, these simple techniques will set you up for long-term success.
Watch the Companion Video
If you’d like to see these techniques demonstrated step-by-step, be sure to watch “Episode 2 of my Beginner’s Guide to Clarinet” on YouTube.
Why Good Posture Matters
Think of your body like the tripod that supports a camera. If the tripod is unstable, the picture will be shaky. Your body works the same way.
When your posture is balanced:
* You breathe more easily.
* Your shoulders and neck stay relaxed.
* Your fingers move with greater freedom.
* Playing feels more comfortable.
* You’ll develop a fuller, more consistent sound.
Good posture isn’t about sitting perfectly still or rigidly straight. It’s about creating a stable, relaxed foundation that allows your body to work naturally.
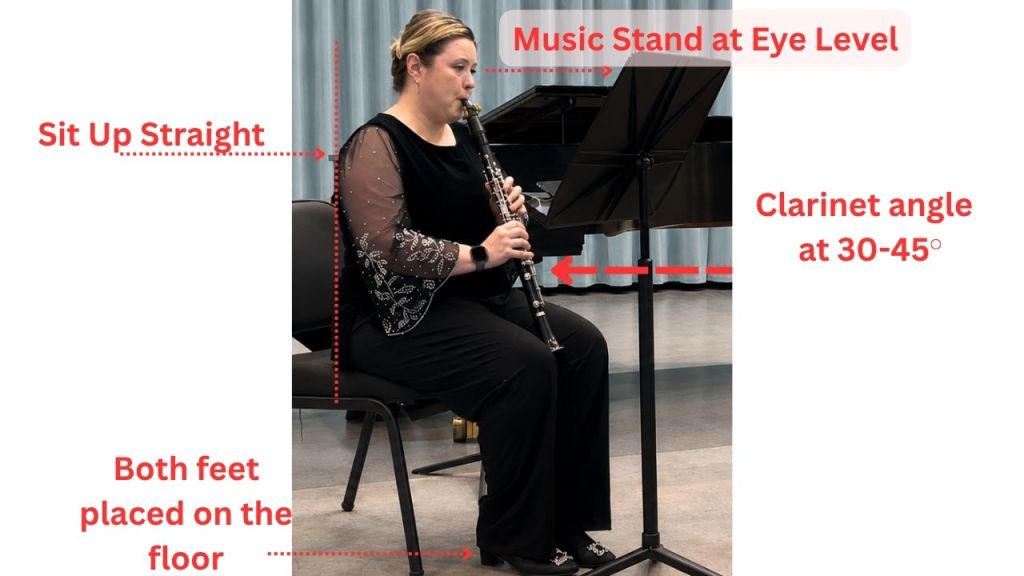
Step 1: Sit Tall—but Stay Relaxed
One of the easiest ways to improve your playing is to sit correctly.
Instead of leaning against the back of your chair, sit toward the front half of the seat. Lengthen your spine while keeping your shoulders relaxed.
One of my favorite teaching images is to imagine that a string is attached to the top of your head, gently pulling you upward. This helps create a long spine without making your body feel stiff.
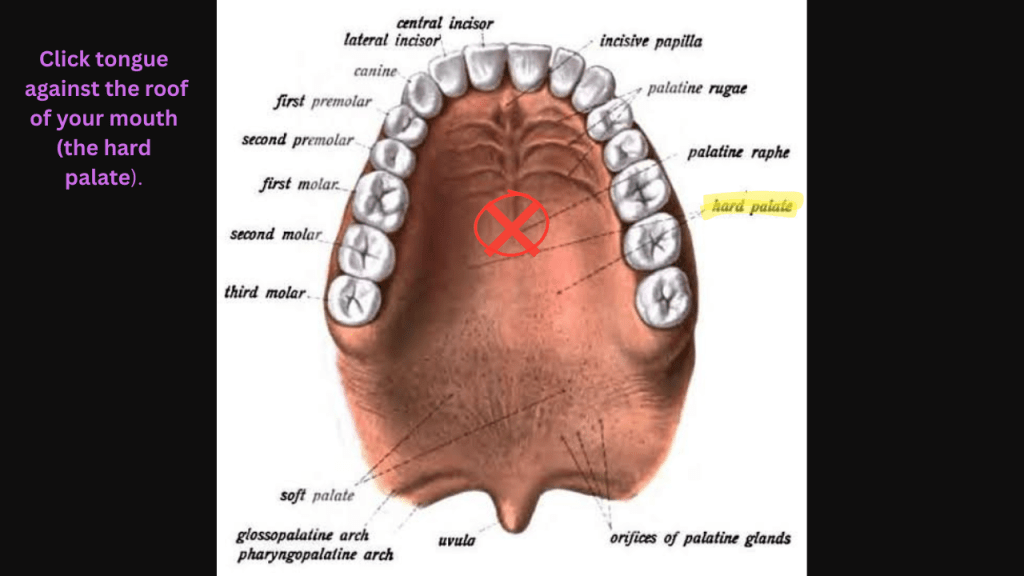
Another helpful trick is to lightly touch your tongue to the roof of your mouth, about halfway back along your hard palate. Many students find that this naturally brings their head into better alignment over their spine.
Most importantly:
**Bring the clarinet to your face—not your face to the clarinet.
If you lean your head forward to meet the instrument, tension quickly builds in your neck and shoulders, making it more difficult to breathe and maintain a consistent embouchure.
Step 2: Plant Your Feet
Your feet provide the foundation for your entire playing position.
Place both feet flat on the floor about shoulder-width apart with your knees bent at roughly a 90-degree angle.
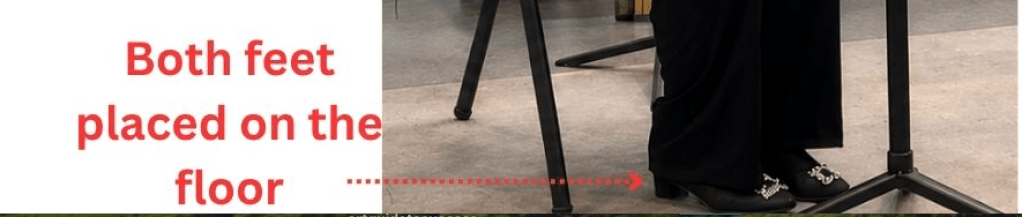
Avoid:
* Crossing your legs
* Tucking one foot underneath your chair
* Sitting so high that your feet dangle
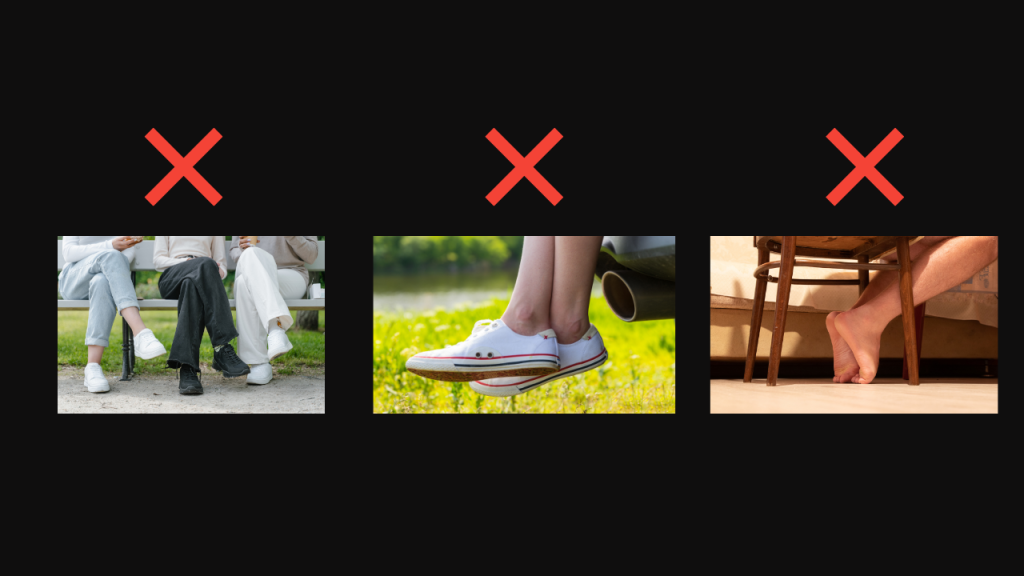
After teaching clarinet for more than 25 years, I’ve noticed that many younger students simply have chairs that are too tall. When their feet don’t touch the floor, they lose stability, which affects posture, breathing, and hand position.
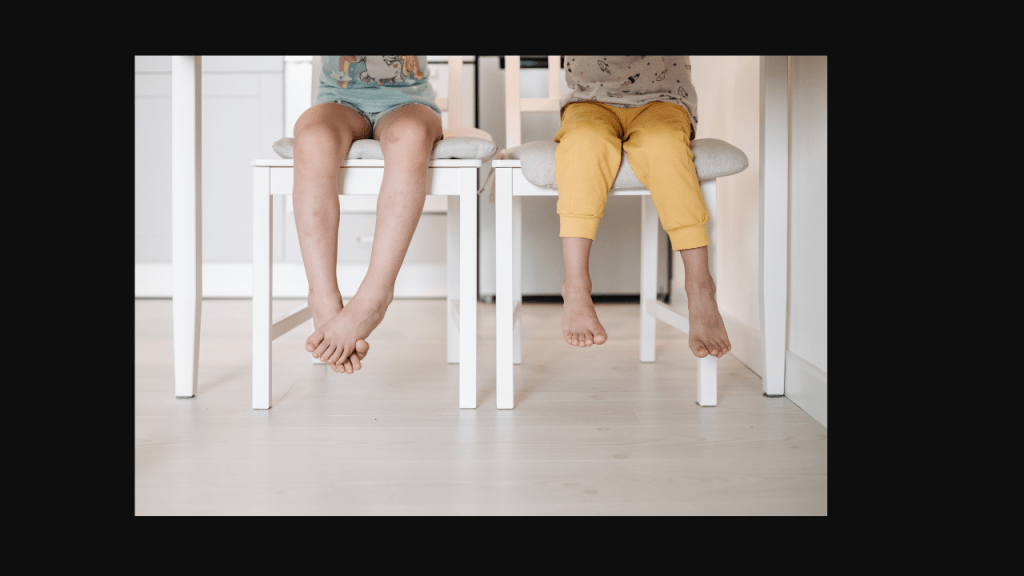
If necessary, use a small footstool, yoga block, or sturdy box to support the feet. This simple adjustment can make a tremendous difference for both children and adults.
Hold the Clarinet at the Correct Angle
Another common beginner mistake is pointing the clarinet straight out in front of the body.
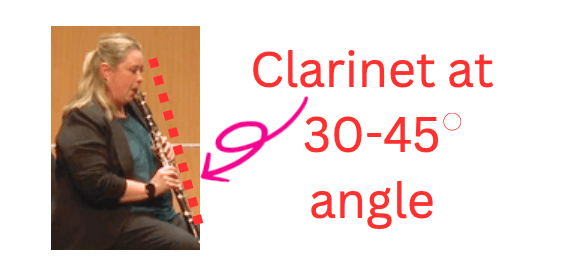
Instead, hold the clarinet at approximately a 30–45 degree angle.
The bell should point comfortably toward the floor while your head remains upright.
Remember:
* Keep your head balanced.
* Bring the clarinet to you.
* Don’t chase the mouthpiece with your neck.
This small adjustment allows your breathing, embouchure, and overall playing position to remain much more relaxed.
Left Hand Position
Your left hand always goes on top.
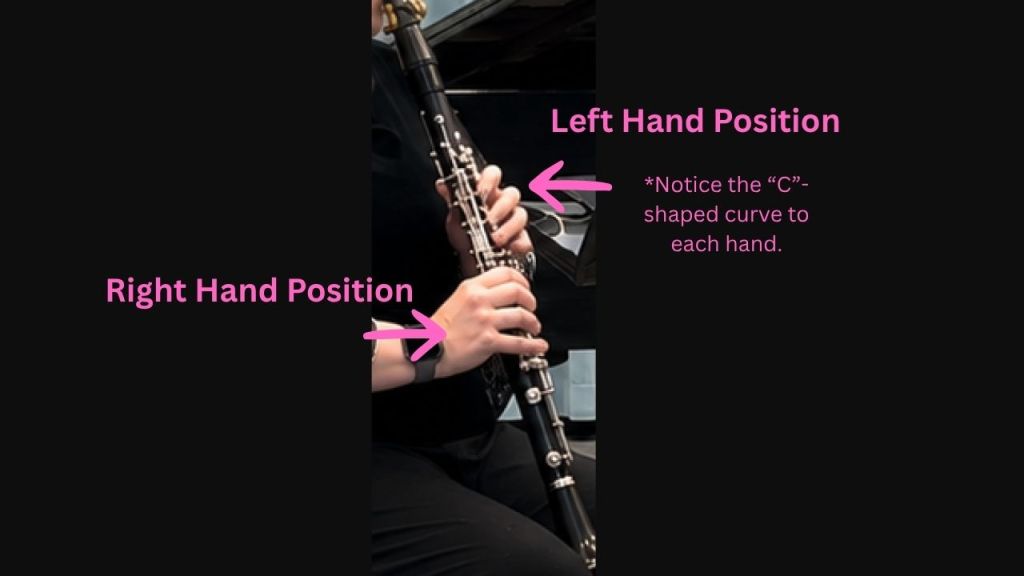
Your left thumb rests over the thumb hole (and register key depending on the register you’re playing), while your index, middle, and ring fingers naturally cover the first three tone holes.
Keep your fingers gently curved—as if you’re holding a ping pong ball in the C-shaped curve between your thumb and first finger.
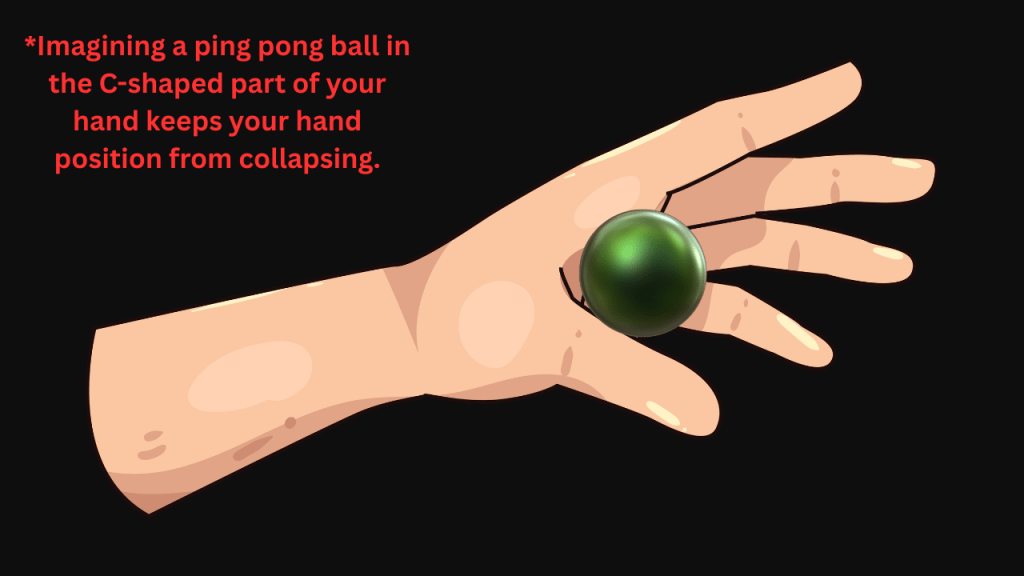
Avoid flattening your fingers against the instrument. Curved fingers move faster, stay more relaxed, and prepare you for more advanced technique later.
—
Right Hand Position
Your right thumb has an important job—it supports nearly all of the weight of the clarinet. I generally recommend placing the thumb rest so it sits on the middle knuckle of your right thumb (think of the thumb rest as resting on the inside edge of your thumb’s middle joint, since your thumb is rotated rather than facing straight up). The goal is to create a relaxed C-shaped curve in your right hand.
The remaining three fingers rest naturally over the lower tone holes while maintaining the same relaxed curved shape.
Many beginners try to hold the clarinet with a tight grip, but the goal isn’t to squeeze the instrument. Your hands should stay relaxed while your right thumb provides stable support.
When you’re first learning the clarinet, it’s helpful to think of your pinkies as resting over the pinky keys in each hand instead of pointing out away from the instrument. You might not be using all of the pinky keys right away, but it’s best to keep them in line with the keys.
A Note for Younger Players (and Their Parents)
If you have smaller hands, you may find it difficult to comfortably reach every tone hole.
That’s completely normal.
One challenge I frequently see is the right-hand ring finger sliding off its tone hole while students try to stretch to reach the others.
Even a tiny gap allows air to escape, often causing:
* Squeaks
* Airy notes
* Notes that won’t speak at all
Instead of using your fingertips like you’re typing on a keyboard, use the soft pads of your fingers to completely seal each tone hole.
Try the Finger Pad Test
Here’s a simple way to check your finger placement.
Press your fingers firmly over the tone holes for about five seconds.
Then lift them and look at your fingertips.
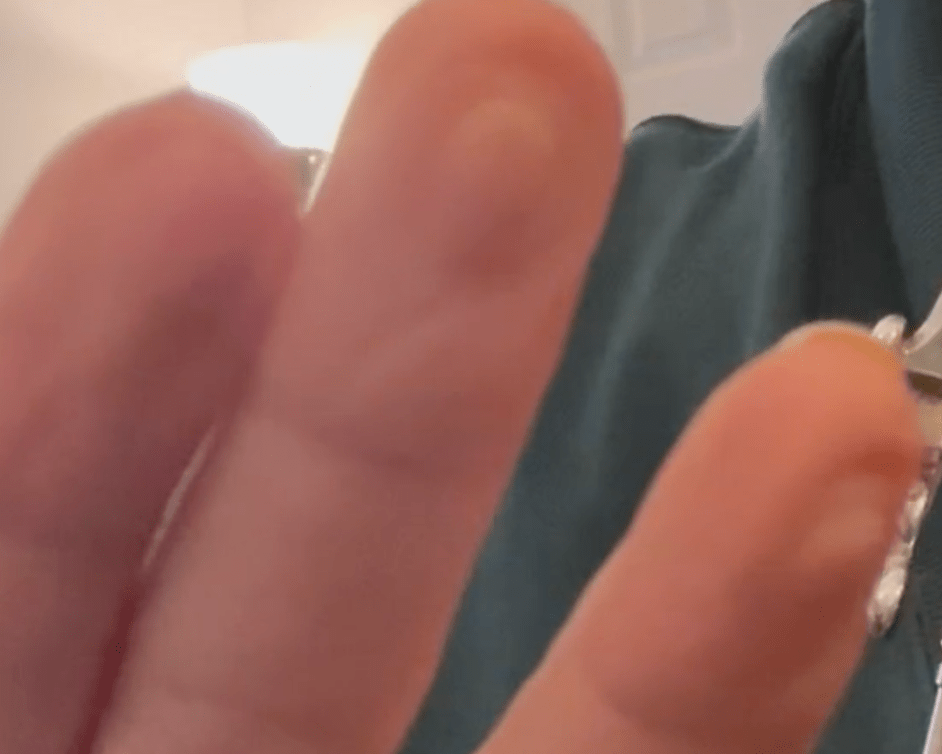
If your fingers were centered correctly, you should see a nice circular impression on the pad of each finger.
Remember—this is only a test.
When you’re actually playing, your fingers should stay relaxed and use only enough pressure to completely seal each tone hole.
What About the Thumb Rest?
Some beginner clarinets have thumb rests that sit too low for younger students or players with smaller hands.
A thumb rest that’s too low can make it much harder to comfortably reach the tone holes.
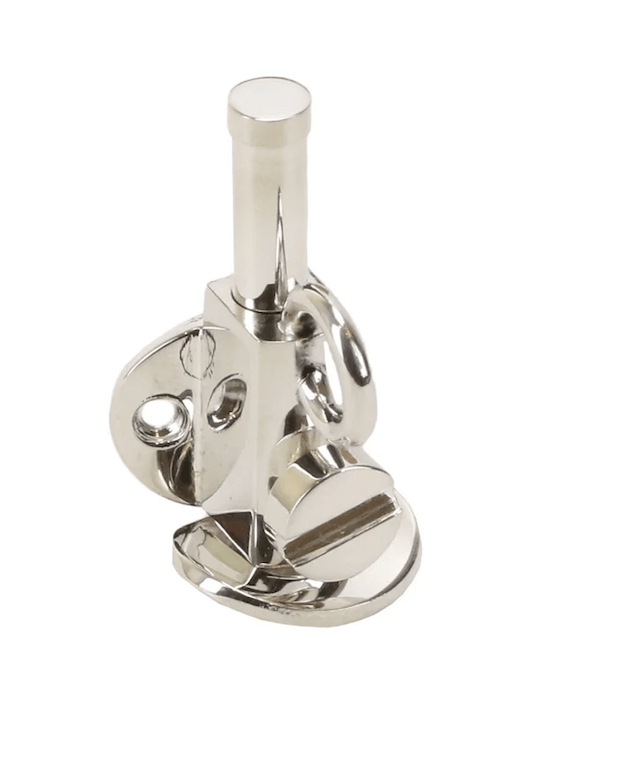
If you’ve been struggling with hand position despite practicing good technique, ask your teacher or a qualified repair technician whether an adjustable thumb rest might be a good option for you. Sometimes a small adjustment can make a surprisingly big difference in comfort and finger reach.
I personally like this adjustable thumb rest by Yamaha. However, it does need to be installed by a good repair tech as they will need to drill new holes into the clarinet and seal the existing thumb rest holes.
Common Beginner Mistakes
As you’re practicing, watch for these common habits:
❌ Flat fingers
✔ Gently curved fingers
❌ Flying fingers far away from the keys
✔ Keep your fingers close to the instrument (but not directly covering tone holes that are not in use).
❌ Gripping the clarinet too tightly
✔ Relax your hands and let your right thumb support the weight
Small corrections now will prevent bigger problems later.
Quick Posture Checklist
Before you begin practicing each day, ask yourself:
✅ Am I sitting tall?
✅ Are my shoulders relaxed?
✅ Are both feet flat on the floor?
✅ Are my knees bent about 90 degrees?
✅ Is my clarinet angled about 30–45 degrees?
✅ Is my left hand on top?
✅ Are my fingers naturally curved?
✅ Is my right thumb supporting the instrument?
Taking just a few seconds to check your setup can make every practice session more productive.
Download My FREE Beginner’s Guide to the Clarinet
If you found this article helpful, you’ll love my FREE Beginner’s Guide to the Clarinet eBook.
Inside you’ll find:
* Step-by-step beginner lessons
* Practice tips
* Equipment recommendations
* Clarinet assembly guide
* Posture and embouchure illustrations
* And much more!
📖 Download your free copy here:
👉 https://preview.mailerlite.io/preview/1705196/sites/161916062640637433/v7odia
Shop My Favorite Beginner Clarinet Supplies
Looking for the supplies I recommend to my own students?
Visit my Amazon Shop to find beginner-friendly reeds, cork grease, cleaning swabs, music stands, reed cases, and other essentials.
🛒 Shop my favorite clarinet supplies:
👉 https://www.amazon.com/shop/clarinetnotes
*As an Amazon Associate, I earn from qualifying purchases at no additional cost to you.*
Enjoying These Free Clarinet Lessons?
If you’d like to support future tutorials, free resources, and educational content, you can buy me a virtual coffee on Ko-fi!
☕ Support Clarinet Note Studio:
👉 ❤️ https://ko-fi.com/clarinetnotestudio
Every bit of support helps me continue creating free lessons for the clarinet community.
What’s Next?
Now that you’ve learned how to sit comfortably and hold the clarinet correctly, you’re ready for the next step.
In “Episode 3 of the Beginner’s Guide to Clarinet”, we’ll learn how to form a proper clarinet embouchure so you can begin producing a clear, beautiful sound.
Happy practicing!
❤️Julianna
Discover more from Clarinet Note Studio
Subscribe to get the latest posts sent to your email.

