
By Julianna Evans
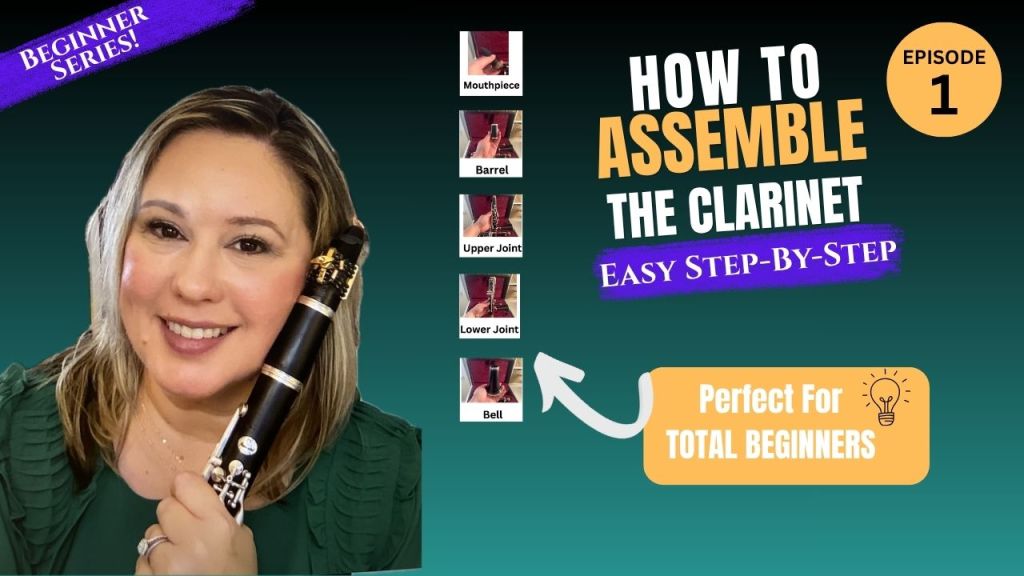
If you’ve just opened your brand-new clarinet case, congratulations! Learning how to assemble your clarinet correctly is the very first step toward making beautiful music. While putting the instrument together may seem intimidating at first, it’s actually quite simple once you know the proper order and technique.
In this blog, I’ll walk you through assembling your clarinet safely, explain why each step matters, and help you avoid some of the most common beginner mistakes that can lead to bent keys or broken reeds.
Watch the Video Tutorial
If you’d like to follow along visually, I’ve created a step-by-step YouTube lesson that demonstrates exactly how to assemble your clarinet.
🎥 https://youtu.be/hq17JC_aQcw
Before You Begin
Lay your case on a stable surface where each section of the clarinet is easy to reach.
Most beginner clarinets have five main pieces:
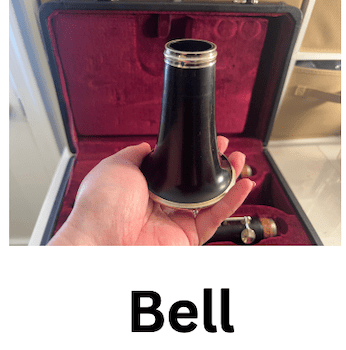
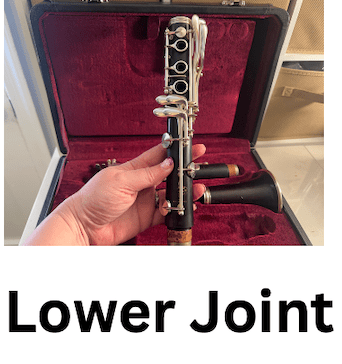
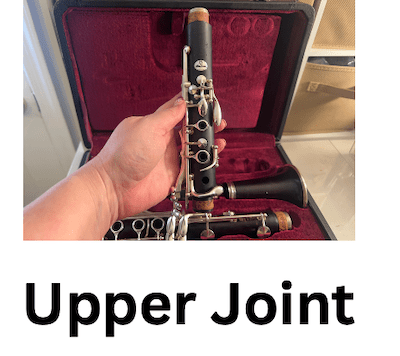
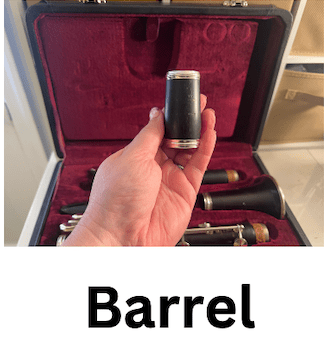
You’ll also have a ligature and a reed that you’ll attach to the mouthpiece after the clarinet is assembled.
Step 1: Apply Cork Grease
If your clarinet is new or the corks feel tight, apply a small amount of cork grease to each cork. Use only enough to lightly coat the cork. Too much cork grease attracts dirt and can wear the cork more quickly. If the joints slide together easily, you don’t need to apply more.
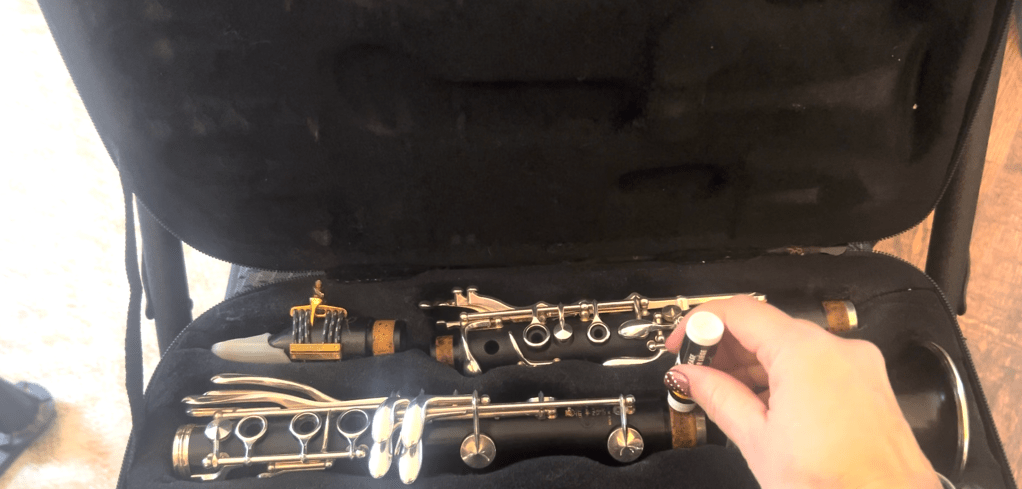
**Beginner Tip:** Never force two sections together. If they don’t fit easily, add a little more cork grease rather than twisting harder.
Step 2: Connect the Bell and Lower Joint
Think of putting your clarinet together the same way you would build a house. You want to start with a solid foundation and build from there.
Gently twist the bell onto the lower joint. Hold the lower joint by the body of the instrument rather than squeezing the keys. The bell should slide on smoothly without excessive force.
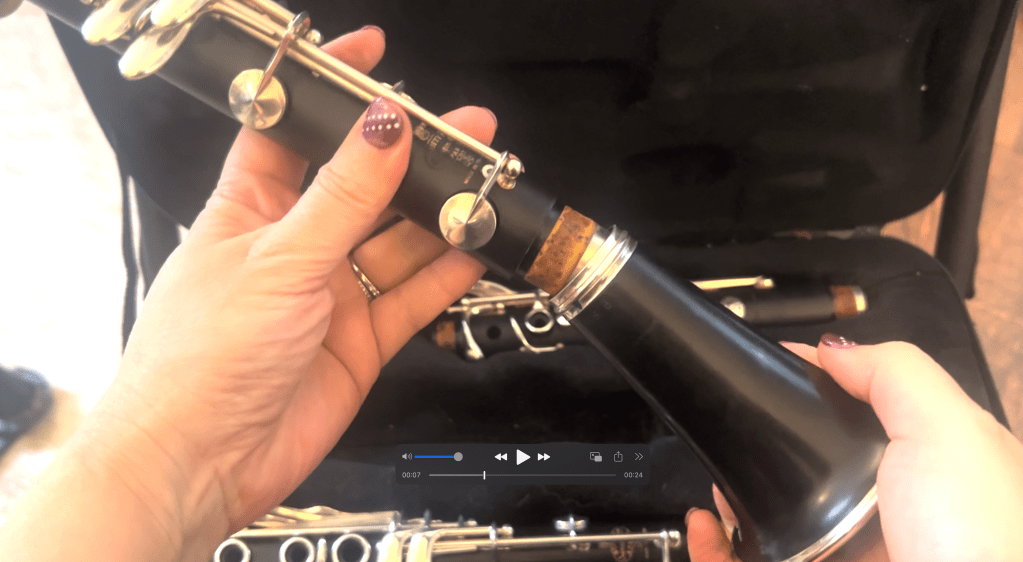
Be careful not to place your hand over the lower joint keys and rods as you’re assembling this part of the clarinet. The metal on the lower joint of the clarinet is somewhat malleable and is notorious for bent keys that result in the pads/pad cups not seating over the tone holes properly. This is more commonly due to the player grabbing onto the lower rod and shoving the lower joint into the bell.
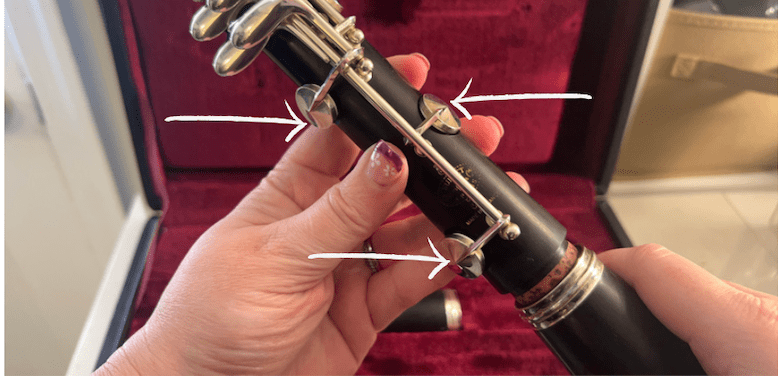
Make sure to avoid putting your hand over the pad cups where the arrows are in the above photo. Also, avoid putting your hand over the rod that connects the pad cups. Instead, I like to place the palm of my left hand on the back side of the lower joint and twist the bell on with my right hand (which is my dominant hand).
Step 3: Attach the Upper Joint to the Lower Joint
Next, align the upper joint with the lower joint and ensure you align the bridge key between the lower and upper joint. Each piece should fit seamlessly, creating a sturdy framework for your instrument.
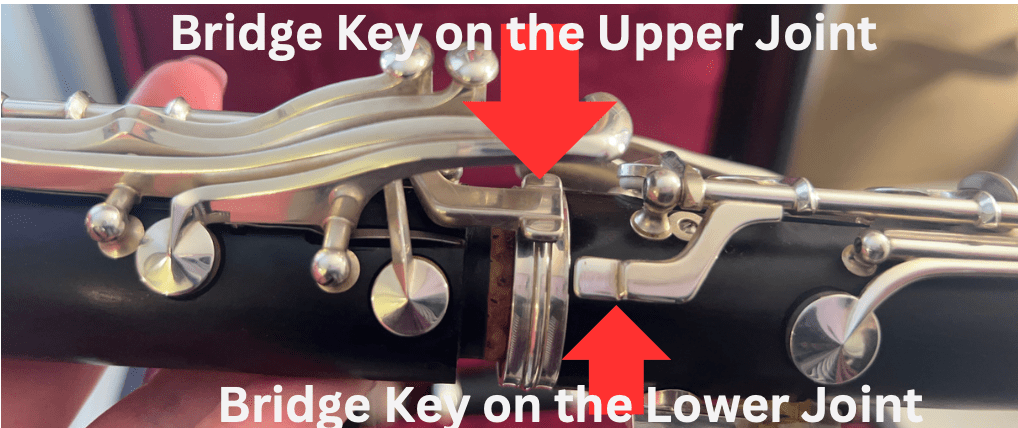
The goal is to align the bridge key from the upper joint over the bridge key on the lower joint. If done properly the clarinet should be in perfect alignment.
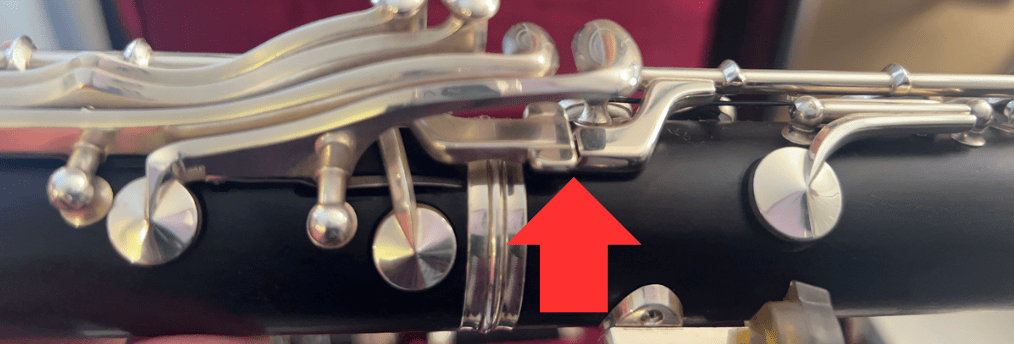
This is what the bridge key will look like when assembled correctly. (Some bridge keys will look different from the clarinet model in the above photo.)
Step 4: Attach the Barrel
Now connect the barrel to the top of the upper joint. Again, use a gentle twisting motion instead of pushing straight down. The barrel should fit snugly but shouldn’t require a great deal of force.
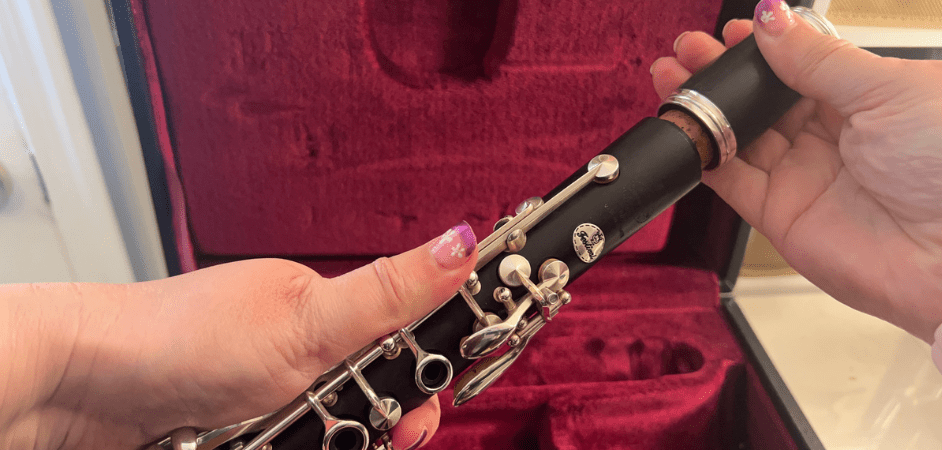
Step 5: Attach the Mouthpiece
Twist the mouthpiece onto the barrel while holding both pieces securely.
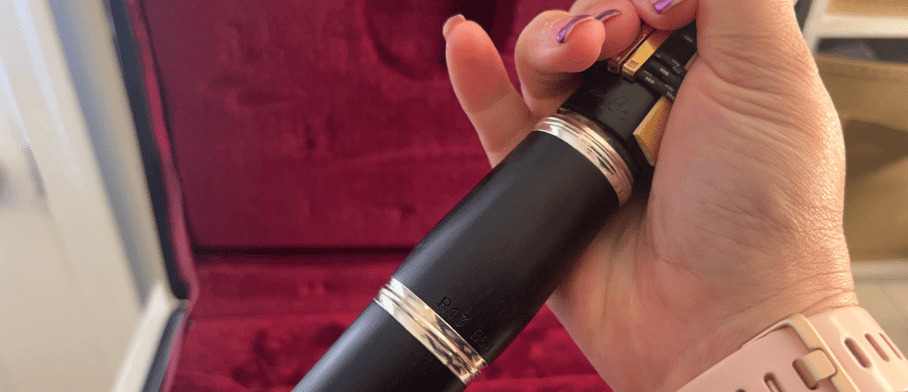
Step 6: Add the Ligature and Reed
Once I have the clarinet assembled, I like to attach the reed to the mouthpiece with the ligature. Wet the reed in your mouth before placing it on the mouthpiece. Avoid overwetting the reed. I like to place the reed in my mouth for two seconds to get both sides of the reed wet.
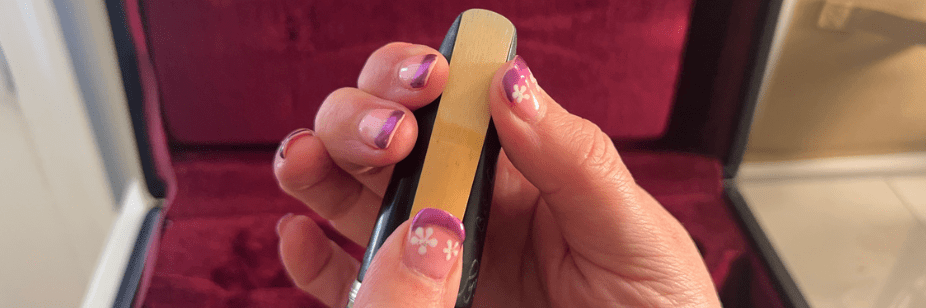
Use your thumb to keep the reed positioned in place while you use your other have to place the ligature over the mouthpiece and reed. You might need to reposition the sides of the reed back into place once the ligature is positioned on the mouthpiece.
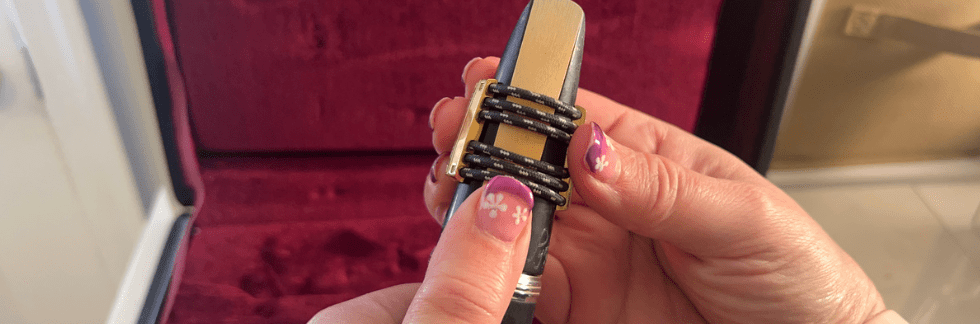
Once you’re happy with your reed placement, tighten the screw of the ligature to keep the reed in place.
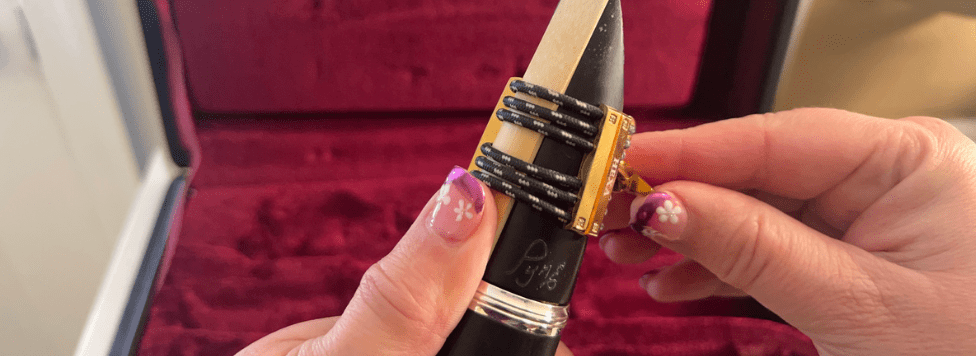
*Notice that the ligature in these photographs might be different from your ligature. All clarinet ligature screws will be on the right side of the mouthpiece as the reed faces you. If the screws are on the left side as you look at the reed, that means you have the ligature on backwards. Also, clarinet ligatures come in two styles: inverted and non-inverted. Inverted means that the screw is on the top side of the mouthpiece (not the reed side). Non-inverted is placed on the reed side of the mouthpiece.
Common Beginner Mistakes
Even experienced clarinetists occasionally make mistakes! Here are a few to avoid:
❌ Grabbing the clarinet by the keys
❌ Forgetting cork grease when the joints are tight
❌ Forcing the instrument together
❌ Tightening the ligature too much
❌ Touching or chipping the tip of the reed
Taking an extra minute during assembly can save you from expensive repairs later.
Disassembling the clarinet is the reverse order of assembling. I like to take the mouthpiece off before I swab the clarinet (I prefer to clean and swab the mouthpiece separately from the clarinet since it’s more fragile). If you want a blog/video of how I take my clarinet apart, please let me know in the comments. I’d be happy to show how I do that.
My Favorite Beginner Clarinet Accessories
Having the right supplies makes learning much easier.
These are the items I recommend to all of my beginning students:
* Cork grease
* Quality beginner mouthpiece (most stock mouthpieces that come with rentals are not very good, IMO).
* Quality beginner reeds
*Quality ligature
* A silk swab
* A reed case
* A mouthpiece cap
I’ve gathered all of my favorite beginner clarinet products in one convenient place.
**🛒 Shop my recommended beginner clarinet supplies here:**
👉 https://www.amazon.com/shop/clarinetnotes
*As an Amazon Associate, I earn from qualifying purchases at no additional cost to you. Thank you for supporting Clarinet Note Studio!*
Download My Free Beginner Clarinet eBook
If you’re just getting started, be sure to download my FREE Beginner’s Guide to the Clarinet eBook.
Inside you’ll find:
* Clarinet assembly checklist
* Beginner practice tips
* Embouchure basics
* Hand position illustrations
* Daily practice routine
* Equipment recommendations
It’s the perfect companion to this Blog and YouTube series.
**📘 Download your free copy here:**
👉 https://preview.mailerlite.io/preview/1705196/sites/161916062640637433/v7odia
What’s Next?
Now that your clarinet is assembled, it’s time to learn how to hold it correctly!
In the next lesson of my Beginner’s Guide to the Clarinet series, I’ll show you the proper posture and hand position that will help you play comfortably and develop a beautiful sound from day one.
Until then, happy practicing!
Discover more from Clarinet Note Studio
Subscribe to get the latest posts sent to your email.

